Store and Retrieve a File with Amazon S3
HOW-TO GUIDE
Introduction
This step-by-step how-to guide will help you store your files in the cloud using Amazon Simple Storage Solution (Amazon S3). Amazon S3 is a service that enables you to store your data (referred to as objects) at massive scale. In this guide, you will create an Amazon S3 bucket (a container for data stored in Amazon S3), upload a file, retrieve the file, and delete the file.
The resources you create in this guide are AWS Free Tier eligible.
Cost to complete
Free Tier
Services used
Storing Your Files with AWS
Requires an Account
AWS Free Tier includes 5GB storage, 20,000 Get Requests, and 2,000 Put Requests with Amazon S3.
Last updated
June 1, 2022
Implementation
-
Enter the Amazon S3 console
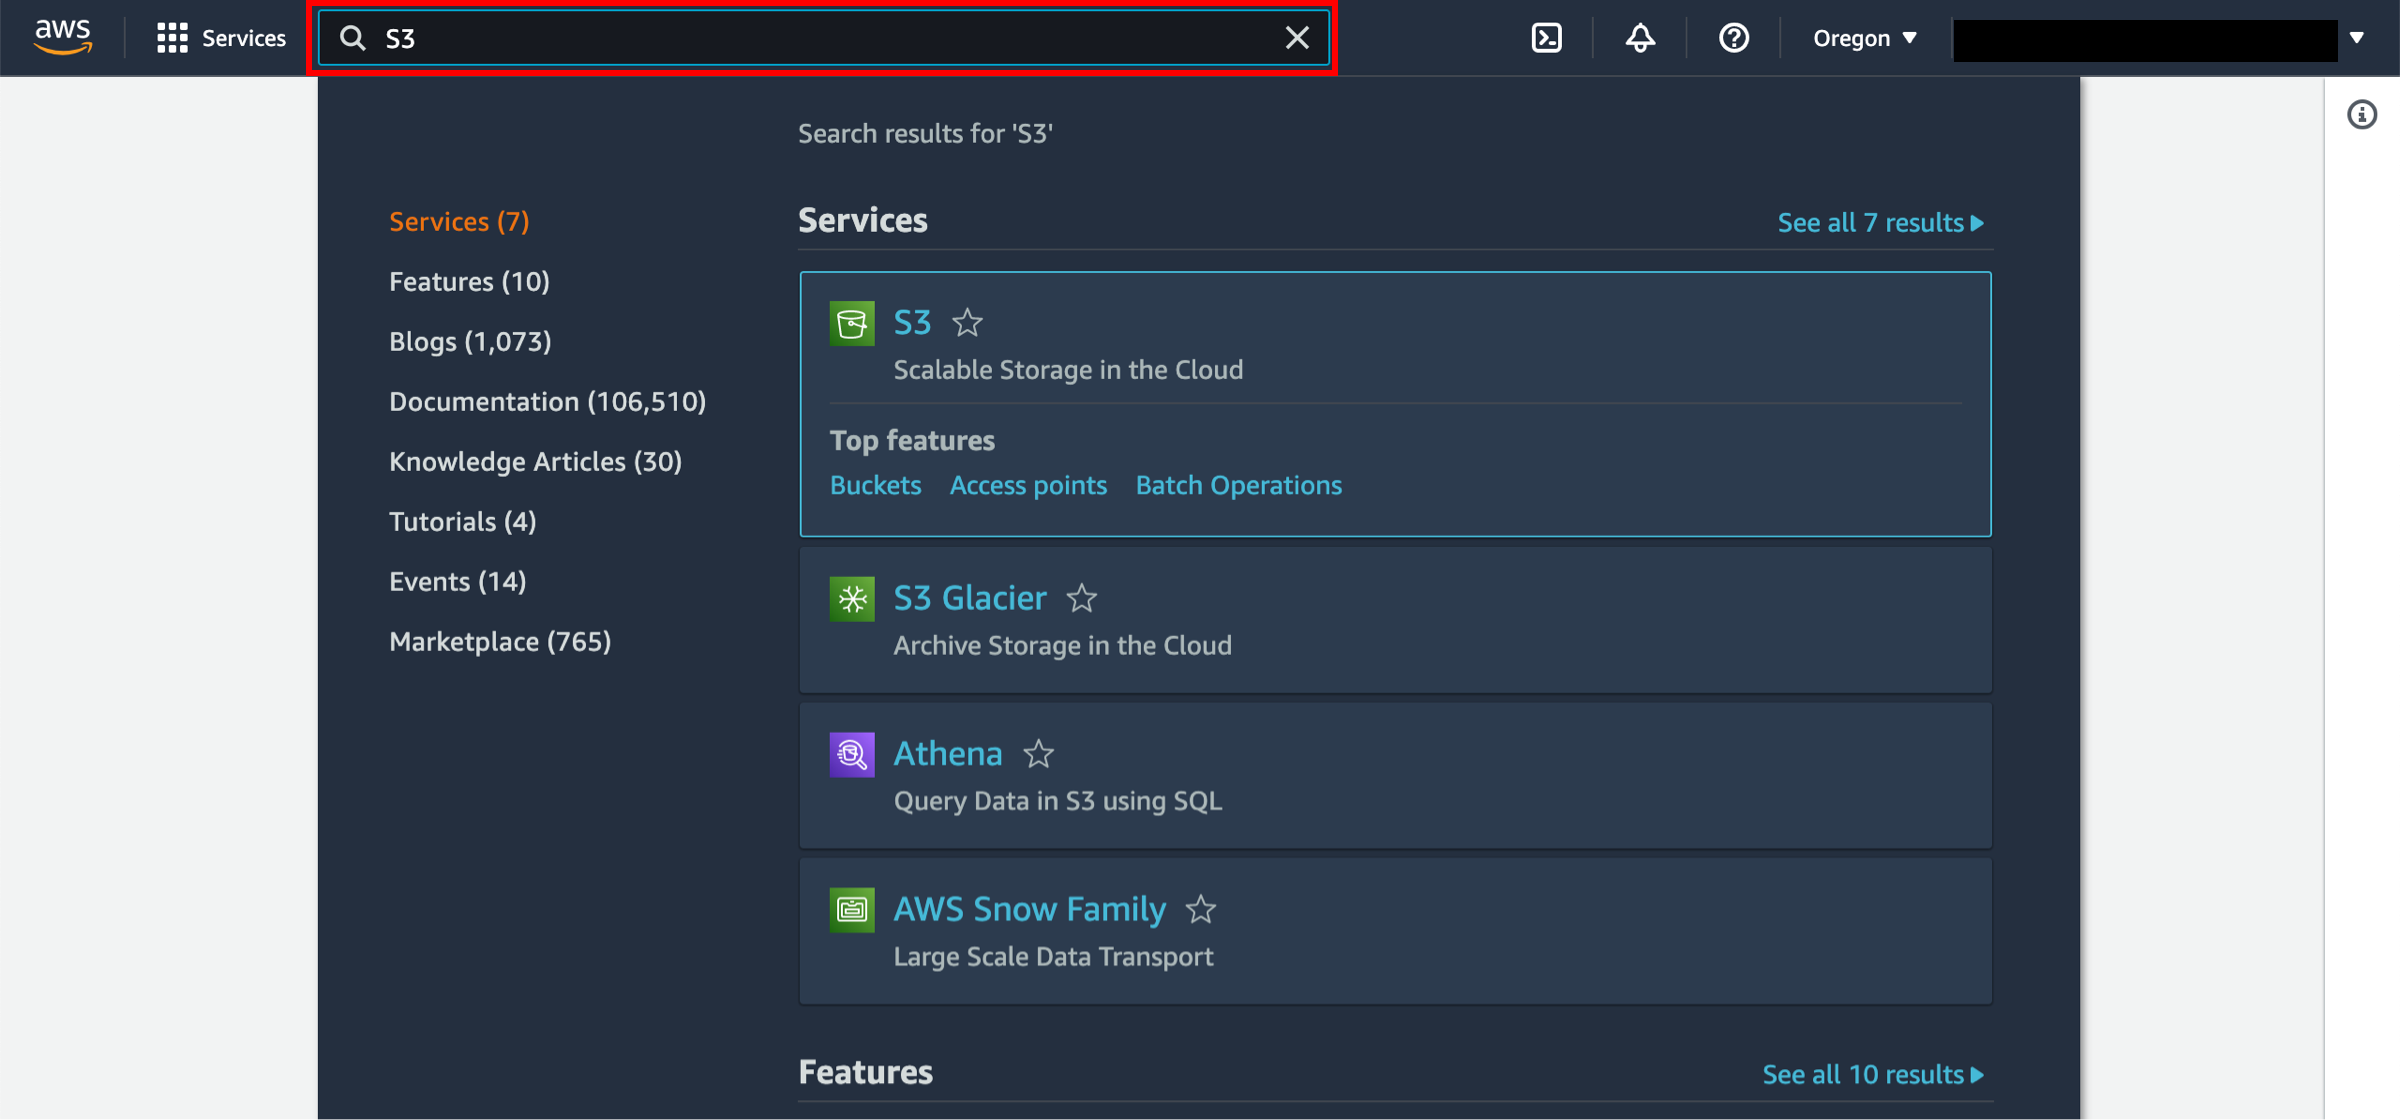
Click on the AWS Management Console home to open the console in a new browser window, so you can keep this step-by-step guide open. When the screen loads, enter your user name and password to get started. Then type S3 in the search bar and select S3 to open the console.

-
Create an S3 bucket
In this step, you will create an Amazon S3 bucket. A bucket is the container you store your files in.
a. In the S3 dashboard, click Create Bucket.
If this is the first time you have created a bucket, you will see a screen that looks like the image pictured here.
If you have already created S3 buckets, your S3 dashboard will list all the buckets you have created.
.4dc57e5e65a375c4d83ea933683a9396e512d32b.png)
b. Enter a bucket name. Bucket names must be unique across all existing bucket names in Amazon S3. For this guide, we have used mysuperawsbucket, but you should choose a name that is relevant and unique to you. There are a number of other restrictions on S3 bucket names as well. Once you've selected a name, select a Region to create your bucket in.
.3b651c425cbd9fa22a0577c2de36e2664d35b4dc.png)
c. You have the ability to set permission settings for your S3 bucket. Leave the default values and select Next.
.d95dfbc401670f2864310bdfdfe3bbb558e96627.png)
d. You have many useful options for your S3 bucket including Versioning, Tags, Default Encryption, and Object Lock. We won't enable them for this tutorial.
Select Create bucket.
.e78eb7a004ce7902a987353f23337224ef10fb87.png)
-
Upload a file
In this step, you will upload a file to your new Amazon S3 bucket.
a. You will see your new bucket in the S3 console. Click on your bucket’s name to navigate to the bucket.
.f6abfd8d069a62e96127ccc993b76f2e37664cf7.png)
b. You are in your bucket’s home page. Select Upload.
.d69937e22c3c957aa1587c913d193b1caccc5968.png)
c. To select a file to upload, either click Add files or Add folder and select sample file(s) that you would like to store or Drag and Drop a file on the upload box. Your file(s) will be displayed after you have selected file(s) to upload.
.b9348f2637920ffe997280b28234e832e0b3f445.png)
d. You have the ability to review destination details and permissions. For this tutorial, leave the default values.
.56a42d431de3c043fe8fcf52042580c6889b9fe1.png)
e. You have the ability to set property settings like storage class, server-side encryption, additional checksums, tags, and metadata with your object. Leave the default values and select Upload.
.b2f87a18e1c16b8b1dbfb6109d7f8a953423085a.png)
f. You will see your object in your bucket’s home screen.
.87f4c614cf9f19cbeeb20759b219c54855bf058f.png)
-
Retrieve the object
In this step, you will download the file from your Amazon S3 bucket.
a. Select the checkbox next to the file you would like to download, then select Download.
.51ea688184b0915c6cc301d5be549450ae3b9679.png)
-
Delete the object and bucket
You can easily delete your object and bucket from the Amazon S3 console. In fact, it is a best practice to delete resources you are no longer using so you don’t keep getting charged for them.
a. You will first delete your object. Select the checkbox next to the file you want to delete and select Delete.
.d30ed7579af514159b83ef6e586853aa2331162c.png)
b. Review and enter permanently delete in the text input field to confirm deletion. Click Delete objects.
.c2915a74d4fec890755bfbfae9373ff4e7cc0516.png)
c. Click on Amazon S3 > Buckets to view all your buckets in the region.
.7057c4a4d0f3241ef4e2215a39a7c7463c167895.png)
d. Select the radio button to the left of the bucket you created, then choose Delete.
.a0aad94442e2c1a837535af2daaf0c0b50661139.png)
e. To confirm deletion, enter the name of the bucket in the text input field and choose Delete bucket.
.2f7c063abd2706bb634354af9acd92085eea80d6.png)
Congratulations!
You have backed up your first file to the cloud by creating an Amazon S3 bucket and uploading your file as an S3 object. Amazon S3 is designed for 99.999999999% durability to help ensure that your data is always available when you want it. You’ve also learned how to retrieve your backed up file and how to delete the file and bucket.