Overview
Amazon Lightsail is one of the easiest ways to get started on AWS. It offers virtual servers, storage, databases, and networking, plus a cost-effective, monthly plan.
In this tutorial, you deploy a LAMP (Linux Apache MySQL PHP) stack application onto a single Lightsail instance.
You start by deploying a new Lightsail instance that includes Apache, MySQL, and PHP preinstalled. Then, you add the demo application code. When you're done, you will have a solid understanding of how to use Lightsail to quickly stand up a multi-tier web application.
AWS experience
Beginner
Time to complete
10 minutes
Cost to complete
Free Tier eligible
Requires
- AWS account
- Recommended browser: The latest version of Chrome or Firefox
[**]Accounts created within the past 24 hours might not yet have access to the services required for this tutorial.
Last updated
August 23, 2022
Step 1: Create an Amazon Lightsail account
This tutorial is free tier eligible.
If you don’t have one already, create a free AWS account. Then sign in to your account, and navigate to the Lightsail home page.
Already have an account? Sign-in
Step 2: Create an Amazon Lightsail instance
In this section, you start the process of creating an instance by choosing the AWS Region where you want your demo application to run. Additionally, you choose the LAMP Blueprint. Blueprints are preconfigured instance templates that include the core services your application needs to run – in this case, Apache, MySQL, and PHP.
b. An AWS Region and Availability Zone is selected for you. Choose Change AWS Region and Availability Zone to create your instance in another location.
Step 3: Install the application code
In this section, you use a launch script to install the demo application. Launch scripts run the first time an instance boots up, and are used to do any initial configuration on an instance.
b. Paste the script below into the launch script text window.
The script performs the following actions:
- Removes the default Apache website
- Clones the application code from GitHub into the htdocs directory
- Ensures the configuration file is writeable
- Uses sed to read the local database password from a file on the disk and insert it into the configuration file
- Runs an SQL script to set up the application’s database
# remove default website
#-----------------------
cd /opt/bitnami/apache2/htdocs
rm -rf *

# clone github repo
#------------------
git clone -b loft https://github.com/mikegcoleman/todo-php .

# set write permissions on the settings file
#-----------------------------------
sudo chown bitnami:daemon connectvalues.php
chmod 666 connectvalues.php

# inject database password into configuration file
#-------------------------------------------------
sed -i.bak "s/<password>/$(cat /home/bitnami/bitnami_application_password)/;" /opt/bitnami/apache2/htdocs/connectvalues.php

# create database
#----------------
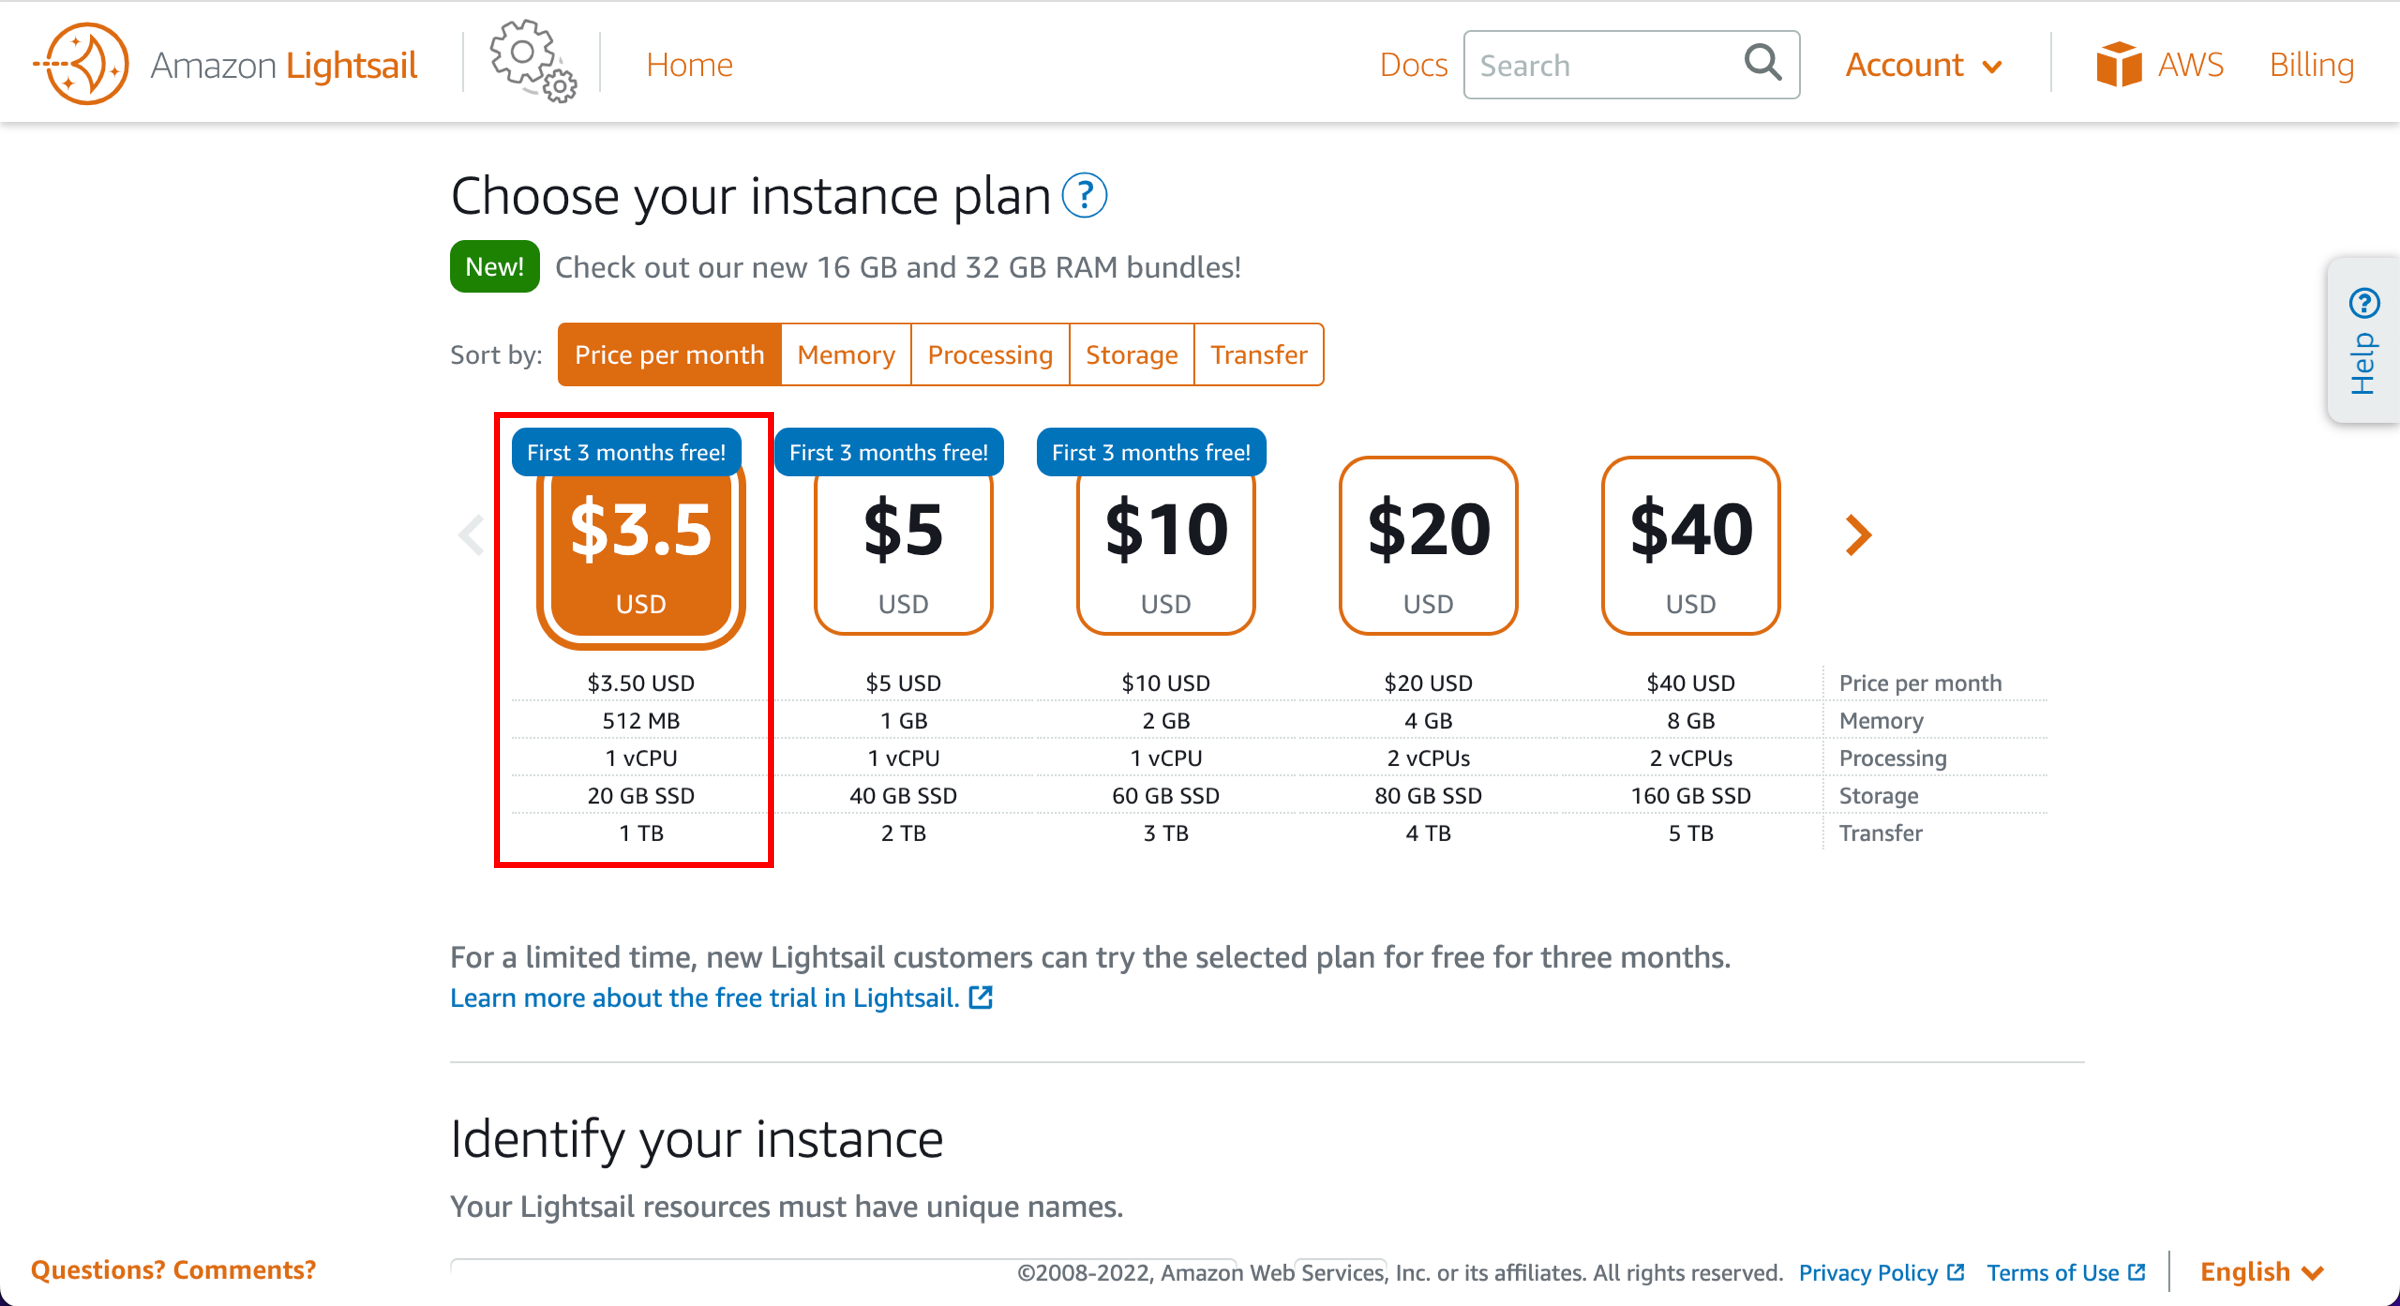
cat /home/bitnami/htdocs/data/init.sql | /opt/bitnami/mariadb/bin/mysql -u root -p$(cat /home/bitnami/bitnami_application_password)A plan includes a low, predictable-cost, machine configuration (RAM, SSD, vCPU), and data transfer allowance. You can try the $3.50 USD Lightsail plan without charge for three months (up to 750 hours). AWS credits three free months to your account.
d. Enter a name for your instance and choose Create instance.
Resource name guidelines:
- Must be unique within each AWS Region in your Lightsail account.
- Must contain 2 to 255 characters.
- Must start and end with an alphanumeric character or number.
- Can include alphanumeric characters, numbers, periods, dashes, and underscores.
Step 4: Test the application
In this section, you access the running application to ensure everything is running properly.
Step 5: Clean up
It is a best practice to delete resources that you are no longer using so that you don't incur unintended charges. If you don't plan to use the instance you created, follow these instructions to delete it.
Conclusion
Congratulations! You used Amazon Lightsail to run a LAMP stack application.
Amazon Lightsail is great for developers, web pros, and anyone looking to get started on AWS quickly and cheaply. You can launch instances, databases, and SSD-based storage; transfer data; monitor your resources; and so much more in a managed way.
Next steps
Now that you have learned how to run a LAMP application using Amazon Lightsail, you can explore ways to assign a static IP, create a DNS entry, and scale your application.

.c33e4afc72643a229461a01ee91606d51c9a2b16.png)


